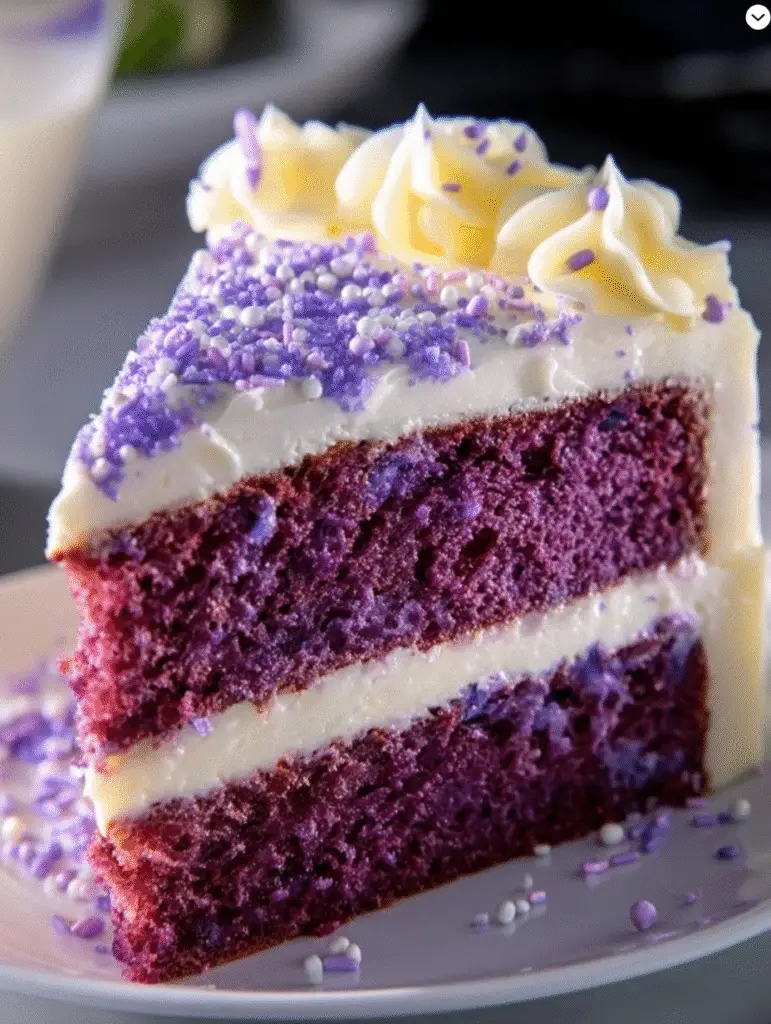
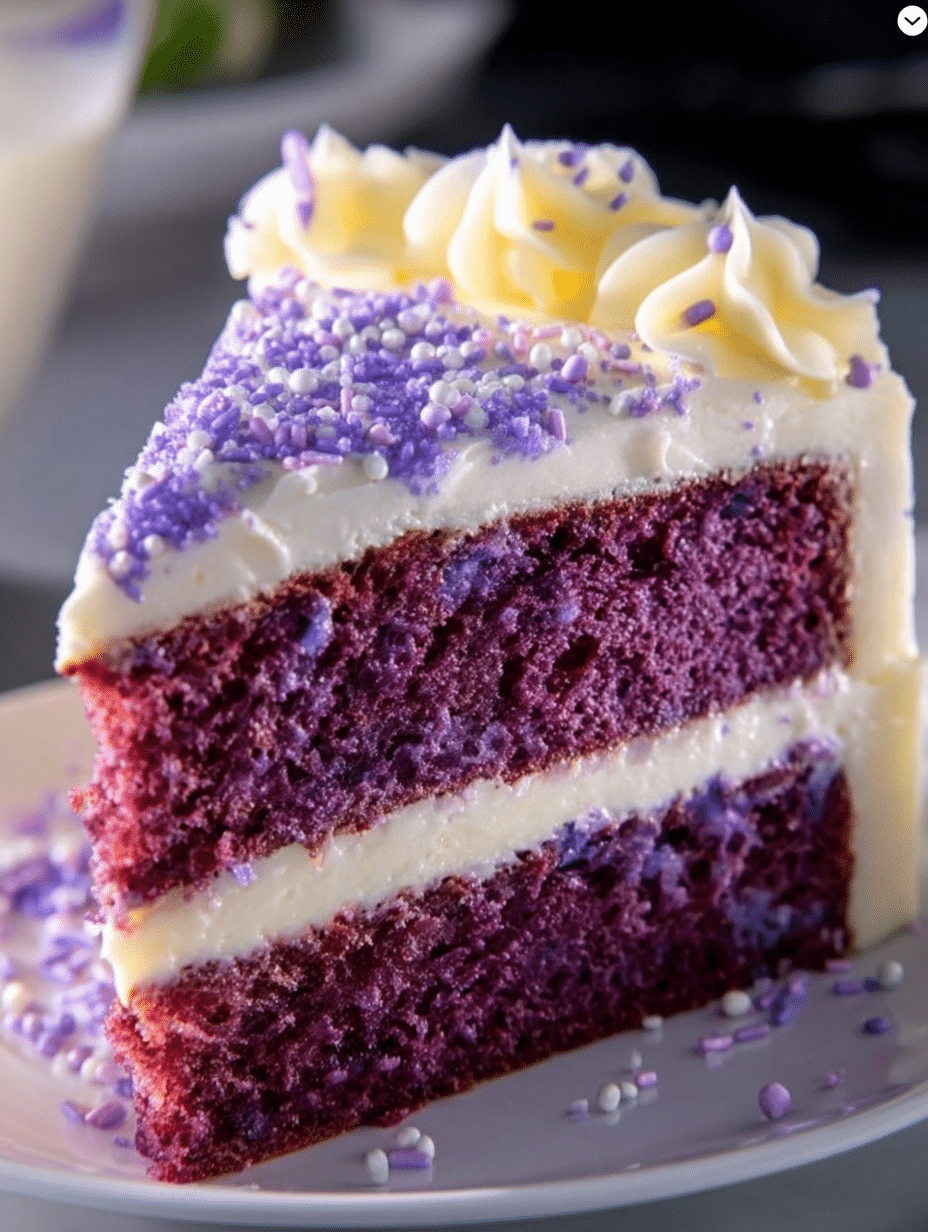
Introduction to Purple Velvet Cake
Welcome to the world of Purple Velvet Cake, where vibrant color meets delightful flavor! If you’re like me, you love a dessert that not only tastes amazing but also looks stunning on the table. This cake is perfect for any celebration, whether it’s a birthday, an anniversary, or just a cozy gathering with friends. Imagine slicing into a cake that reveals a beautiful purple hue, instantly impressing your loved ones. Plus, it’s surprisingly easy to make, making it a quick solution for those busy days when you want to whip up something special!
Why You’ll Love This Purple Velvet Cake
This Purple Velvet Cake is a delightful treat that combines ease and elegance. It’s simple enough for a weeknight dessert yet impressive enough for special occasions. The rich, velvety texture paired with a hint of cocoa creates a flavor that dances on your palate. Plus, the vibrant purple color adds a fun twist that will have everyone reaching for seconds. Trust me, this cake is a showstopper!
Ingredients for Purple Velvet Cake
Let’s dive into the ingredients that make this Purple Velvet Cake a true masterpiece. Each component plays a vital role in creating that luscious texture and vibrant color. Here’s what you’ll need:
- Flour: All-purpose flour is the backbone of this cake, providing structure and stability.
- Sugar: Granulated sugar sweetens the cake and helps achieve that lovely moistness.
- Eggs: They bind the ingredients together and add richness to the flavor.
- Vegetable Oil: This keeps the cake moist and tender, giving it that melt-in-your-mouth quality.
- Buttermilk: Adds a tangy flavor and helps create a soft crumb. You can substitute with regular milk mixed with a splash of vinegar if needed.
- White Vinegar: This reacts with the baking soda to create a light texture.
- Vanilla Extract: A splash of vanilla enhances the overall flavor, making it even more delightful.
- Cocoa Powder: Unsweetened cocoa adds a subtle chocolate flavor, balancing the sweetness.
- Baking Powder and Baking Soda: These leavening agents help the cake rise beautifully.
- Purple Food Coloring: This is what gives the cake its stunning hue. Use a high-quality gel or powder for the best results.
- Mascarpone or Cream Cheese: This creamy goodness is used for the frosting, adding a rich and smooth texture.
- Heavy Cream: Whipping cream is essential for achieving that fluffy frosting. Make sure it’s cold for the best results!
- Powdered Sugar: This sweetens the frosting and helps it hold its shape.
- Decorative Sprinkles: Use purple and white sprinkles to add a fun touch to your cake.
- Optional Rosettes: A few dollops of frosting on top can elevate the presentation.
For exact measurements, check the bottom of the article where you can find everything listed for easy printing. Happy baking!
How to Make Purple Velvet Cake
Now that we have our ingredients ready, let’s dive into the fun part: making the Purple Velvet Cake! Follow these simple steps, and you’ll be on your way to creating a dessert that’s as delicious as it is beautiful.
Step 1: Preheat the Oven
First things first, preheat your oven to 180°C (350°F). Preheating is crucial because it ensures that your cake bakes evenly. A hot oven helps the cake rise properly, giving it that lovely fluffy texture we all crave. So, don’t skip this step!
Step 2: Prepare the Dry Ingredients
In a mixing bowl, combine the flour, cocoa powder, baking powder, and baking soda. Whisk them together until they’re well blended. This step is important because it helps distribute the leavening agents evenly throughout the flour. A well-mixed dry mixture leads to a perfectly risen cake!
Step 3: Whisk the Wet Ingredients
In another bowl, whisk the eggs and sugar together until the mixture becomes light and fluffy. This usually takes about 2-3 minutes. Then, add in the vegetable oil, buttermilk, white vinegar, and vanilla extract. Whisk until everything is combined. The vinegar reacts with the baking soda, creating a light texture that makes this Purple Velvet Cake so special!
Step 4: Combine Ingredients
Now, it’s time to bring the dry and wet ingredients together. Gradually add the dry mixture to the wet ingredients, stirring gently. This is where the magic happens! As you mix, add the purple food coloring until you achieve your desired shade. Don’t be shy—go bold with that color!
Step 5: Bake the Cake
Once your batter is ready, pour it evenly into two 20 cm round cake pans. Give the pans a little shake to level the batter. Bake in the preheated oven for 25-30 minutes. You’ll know it’s done when a toothpick inserted in the center comes out clean. The aroma will fill your kitchen, and trust me, it’s heavenly!
Step 6: Cool and Prepare the Frosting
After baking, let the cakes cool in the pans for about 10 minutes. Then, transfer them to a wire rack to cool completely. While they cool, let’s whip up the frosting! In a bowl, beat the mascarpone cheese with vanilla and powdered sugar until smooth. Then, add the cold heavy cream and whip until you achieve a firm texture. Cold cream is key here; it helps the frosting hold its shape beautifully!
Step 7: Assemble the Cake
Now comes the fun part—assembling your Purple Velvet Cake! Place one cake layer on a serving plate. Spread a generous layer of frosting on top. Then, gently place the second layer on top and cover the entire cake with the remaining frosting. You can smooth it out or leave it with a rustic look, depending on your style. Finish it off with some decorative sprinkles for that extra flair!

Tips for Success
- Use room temperature ingredients for better mixing.
- Don’t overmix the batter; it can make the cake dense.
- Check for doneness with a toothpick; it should come out clean.
- Let the cakes cool completely before frosting to prevent melting.
- Experiment with the purple food coloring to find your perfect shade.
Equipment Needed
- Two 20 cm round cake pans (or one larger pan, if preferred)
- Mixing bowls (a large one for wet ingredients and a medium one for dry)
- Whisk (or an electric mixer for ease)
- Rubber spatula (for folding ingredients)
- Wire rack (for cooling the cakes)
Variations of Purple Velvet Cake
- Chocolate Purple Velvet: Add more cocoa powder for a richer chocolate flavor.
- Gluten-Free Option: Substitute all-purpose flour with a gluten-free blend for a celiac-friendly version.
- Vegan Twist: Replace eggs with flaxseed meal and use plant-based milk and oil.
- Fruit Infusion: Incorporate mashed berries like blueberries or blackberries for added flavor and natural color.
- Nutty Delight: Add chopped walnuts or pecans for a crunchy texture contrast.
Serving Suggestions for Purple Velvet Cake
- Pair with a scoop of vanilla ice cream for a delightful contrast.
- Serve alongside fresh berries to enhance the cake’s vibrant color.
- Drizzle with a berry coulis for an elegant touch.
- Enjoy with a cup of coffee or tea for a cozy afternoon treat.
- Garnish with edible flowers for a stunning presentation.
FAQs about Purple Velvet Cake
What makes Purple Velvet Cake different from Red Velvet Cake?
The main difference lies in the color and flavor. While Red Velvet Cake has a hint of cocoa and is colored with red dye, Purple Velvet Cake uses purple food coloring and has a unique flavor profile that combines cocoa with a delightful richness.
Can I make Purple Velvet Cake ahead of time?
Absolutely! In fact, making it a day in advance can enhance the flavors. Just store it in an airtight container in the fridge. The frosting will stay fresh, and the cake will remain moist!
What can I use instead of buttermilk?
If you don’t have buttermilk on hand, you can easily make a substitute. Just mix regular milk with a tablespoon of vinegar or lemon juice and let it sit for about 5-10 minutes. This will give you a similar tangy flavor!
How do I store leftover Purple Velvet Cake?
Store any leftover cake in an airtight container in the fridge for up to 3-4 days. If you want to keep it longer, you can freeze it. Just wrap it tightly in plastic wrap and then in aluminum foil.
Can I use a different frosting for my Purple Velvet Cake?
Of course! While mascarpone frosting is delicious, you can use cream cheese frosting, buttercream, or even a whipped ganache for a different flavor twist. Get creative!
Final Thoughts
Creating a Purple Velvet Cake is more than just baking; it’s about crafting a moment of joy. The vibrant color and rich flavor bring smiles to faces, making it a perfect centerpiece for any gathering. I love how this cake transforms an ordinary day into something special, whether it’s a birthday celebration or a simple family dinner. Plus, the process of baking it fills your kitchen with warmth and delightful aromas. So, roll up your sleeves, embrace the fun, and let this Purple Velvet Cake be the star of your next sweet adventure!
Print
Purple Velvet Cake: Discover the Ultimate Recipe Now!
- Total Time: 1 heure
- Yield: 8 portions 1x
- Diet: Vegetarian
Description
A delicious and visually stunning Purple Velvet Cake, perfect for any celebration.
Ingredients
- 250 g de farine tamisée
- 200 g de sucre
- 2 œufs
- 120 ml d’huile végétale
- 120 ml de lait ribot (buttermilk)
- 1 c. à café de vinaigre blanc
- 1 c. à café d’extrait de vanille
- 2 c. à soupe de cacao en poudre non sucré
- 1 c. à café de levure chimique
- ½ c. à café de bicarbonate de soude
- Colorant violet (gélifié ou en poudre, pour un rendu intense)
- 300 g de mascarpone ou fromage frais (type Philadelphia)
- 250 ml de crème liquide entière froide (30% MG)
- 100 g de sucre glace
- 1 c. à café de vanille
- Vermicelles et perles en sucre violettes/blanches
- Quelques rosaces de crème
Instructions
- Préchauffer le four à 180°C.
- Dans un bol, mélanger farine, cacao, levure et bicarbonate.
- Dans un autre bol, fouetter les œufs avec le sucre jusqu’à blanchiment.
- Ajouter l’huile, le buttermilk, le vinaigre et la vanille.
- Incorporer les ingrédients secs petit à petit, puis ajouter le colorant violet jusqu’à obtenir la teinte souhaitée.
- Verser la pâte dans deux moules ronds de 20 cm.
- Cuire 25–30 min. Laisser refroidir avant de démouler.
- Battre le mascarpone avec la vanille et le sucre glace.
- Ajouter la crème bien froide et fouetter jusqu’à obtenir une texture ferme.
- Poser une génoise, étaler une belle couche de crème.
- Déposer la deuxième génoise par-dessus et recouvrir le tout avec la crème restante.
- Lisser ou laisser un effet rustique selon ton style.
- Faire des rosaces de crème sur le dessus.
- Saupoudrer généreusement de vermicelles et perles violettes.
Notes
- Utiliser un colorant de bonne qualité pour un rendu intense.
- La crème doit être bien froide pour bien monter.
- Peut être préparé un jour à l’avance pour un meilleur goût.
- Prep Time: 30 minutes
- Cook Time: 30 minutes
- Category: Dessert
- Method: Baking
- Cuisine: French
Nutrition
- Serving Size: 1 slice
- Calories: 350
- Sugar: 25g
- Sodium: 150mg
- Fat: 20g
- Saturated Fat: 10g
- Unsaturated Fat: 5g
- Trans Fat: 0g
- Carbohydrates: 40g
- Fiber: 2g
- Protein: 4g
- Cholesterol: 50mg


