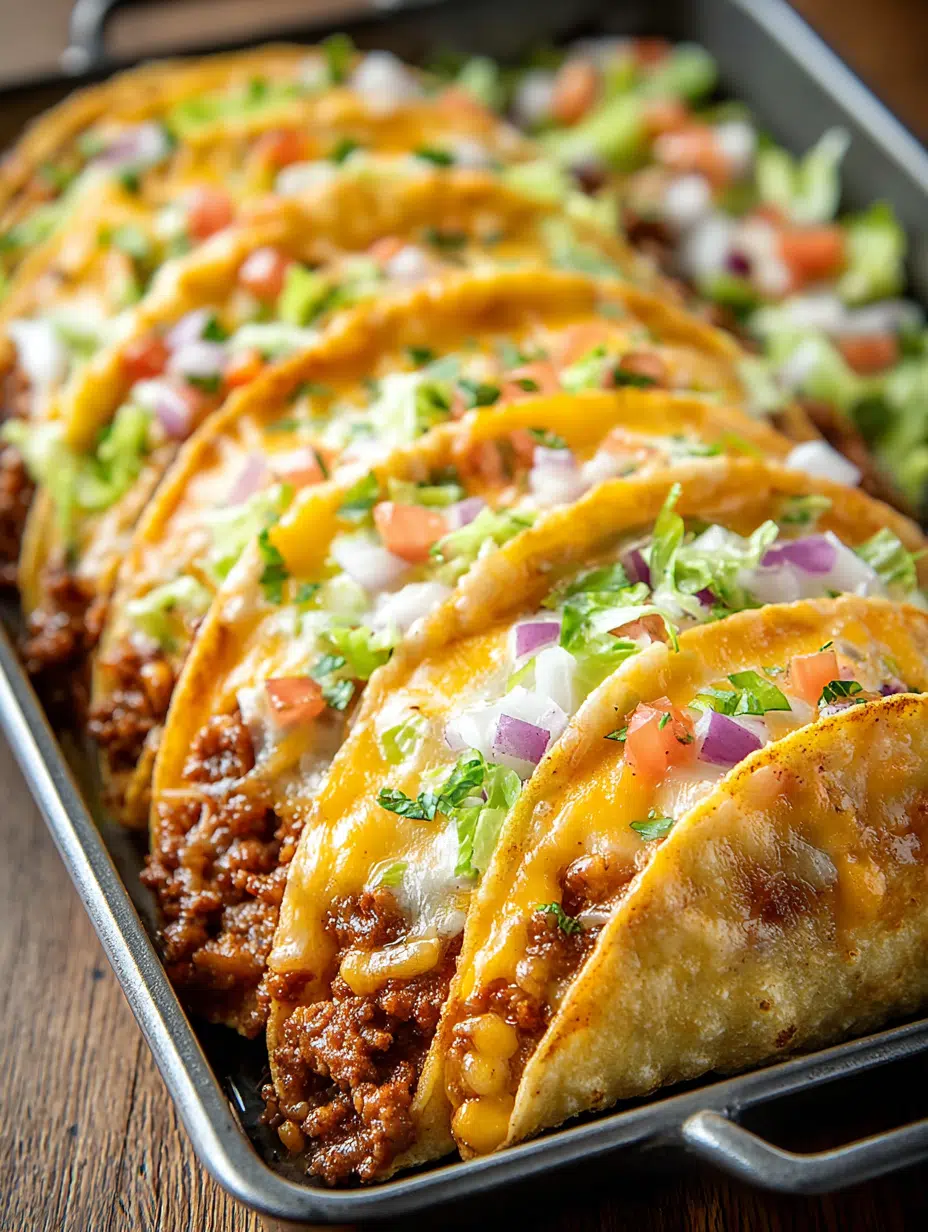
Introduction to Oven-Baked Cheesy Tacos (Crispy & Loaded)
Welcome to the world of Oven-Baked Cheesy Tacos (Crispy & Loaded), where comfort food meets convenience! If you’re like me, juggling a busy schedule while trying to whip up something delicious can feel like a high-wire act. These tacos are the perfect solution for a quick weeknight dinner or a fun gathering with friends. Imagine crispy taco shells filled with seasoned beef and gooey cheese, all baked to perfection. Trust me, this dish will impress your loved ones and leave them asking for seconds!
Why You’ll Love This Oven-Baked Cheesy Tacos (Crispy & Loaded)
These Oven-Baked Cheesy Tacos (Crispy & Loaded) are a game-changer in the kitchen! They come together in just 35 minutes, making them a lifesaver for busy nights. The combination of crispy shells and melty cheese creates a flavor explosion that’s hard to resist. Plus, they’re customizable, so everyone can enjoy their favorite toppings. Whether it’s a family dinner or a party, these tacos are sure to be a hit!
Ingredients for Oven-Baked Cheesy Tacos (Crispy & Loaded)
Gathering the right ingredients is the first step to creating these delightful Oven-Baked Cheesy Tacos (Crispy & Loaded). Here’s what you’ll need:
- Ground Beef: The star of the show! You can also use ground turkey or chicken for a lighter option.
- Olive Oil: A splash of this liquid gold helps sauté the onions and garlic, adding depth to the flavor.
- Onion: Diced onions bring sweetness and a savory base to the filling.
- Garlic: Minced garlic adds a punch of flavor that elevates the entire dish.
- Taco Seasoning: You can use a store-bought packet or whip up your own mix for a personal touch.
- Tomato Sauce or Salsa: This adds moisture and a zesty kick to the meat mixture.
- Salt & Pepper: Essential for seasoning, these staples enhance all the flavors.
- Taco Shells: Choose between flour or corn shells, slightly warmed for easy filling.
- Shredded Cheese: Cheddar or a Mexican blend works beautifully, melting into gooey perfection.
- Lettuce: Shredded lettuce adds a refreshing crunch on top.
- Diced Tomatoes: Fresh tomatoes bring color and juiciness to your tacos.
- Red Onion: Diced red onion adds a sharp bite and vibrant color.
- Cilantro: Fresh cilantro gives a burst of flavor and a pop of green.
- Optional Toppings: Get creative! Sour cream, jalapeños, guacamole, and hot sauce can take your tacos to the next level.
For exact measurements, check the bottom of the article where you can find everything available for printing. Happy cooking!
How to Make Oven-Baked Cheesy Tacos (Crispy & Loaded)
Now that you have all your ingredients ready, let’s dive into the fun part: making these Oven-Baked Cheesy Tacos (Crispy & Loaded)! Follow these simple steps, and you’ll have a delicious meal in no time.
Step 1: Preheat the Oven
First things first, preheat your oven to 375°F (190°C). Preheating is crucial because it ensures that your tacos cook evenly. If you skip this step, you might end up with soggy shells or unevenly melted cheese. Trust me, no one wants that!
Step 2: Prepare the Filling
In a skillet, heat a tablespoon of olive oil over medium heat. Once it’s shimmering, toss in the diced onion and minced garlic. Sauté them until they’re fragrant and the onion turns translucent, about 2-3 minutes. Next, add your ground beef (or turkey/chicken) to the pan. Break it up with a spatula as it cooks. Stir in the taco seasoning and tomato sauce, along with a pinch of salt and pepper. Let it simmer for about 5 minutes. This step is where the magic happens, as the flavors meld together beautifully!
Step 3: Assemble the Tacos
Now comes the fun part—assembling your tacos! Take your slightly warmed taco shells and fill each one with the savory meat mixture. Don’t be shy; pack them in! Then, sprinkle a generous amount of shredded cheese on top. This is what makes them Oven-Baked Cheesy Tacos (Crispy & Loaded), after all. Place the filled shells standing side by side in a greased baking dish. It’s like a taco party in there!
Step 4: Bake the Tacos
Slide your baking dish into the preheated oven and bake for 10-15 minutes. Keep an eye on them! You want the cheese to be melted and bubbly, and the taco shells to be lightly crispy. The aroma wafting through your kitchen will be irresistible, trust me!
Step 5: Add Fresh Toppings
Once your tacos are out of the oven, it’s time to add those fresh toppings. Pile on the shredded lettuce, diced tomatoes, red onion, and cilantro. If you’re feeling adventurous, add a dollop of sour cream, a sprinkle of jalapeños, or a scoop of guacamole. These toppings not only add flavor but also a burst of color to your plate!
Tips for Success
- Warm your taco shells slightly before filling to prevent cracking.
- Don’t overfill the shells; a little goes a long way!
- Experiment with different cheeses for unique flavors.
- Let the tacos cool for a minute before serving; they’ll hold their shape better.
- Make a double batch and freeze leftovers for a quick meal later!
Equipment Needed
- Baking Dish: A 9×13 inch dish works great, but any oven-safe dish will do.
- Skillet: A non-stick skillet makes cooking the filling a breeze.
- Spatula: Use this to break up the meat and mix ingredients.
- Measuring Cups: Handy for portioning out ingredients, but you can eyeball it too!
Variations of Oven-Baked Cheesy Tacos (Crispy & Loaded)
- Vegetarian Option: Swap the meat for black beans or lentils. Add extra veggies like bell peppers and corn for a hearty filling.
- Spicy Kick: Mix in diced jalapeños or a splash of hot sauce into the meat mixture for a fiery flavor.
- Cheesy Delight: Experiment with different cheeses like pepper jack or queso fresco for a unique twist.
- Gluten-Free: Use gluten-free taco shells or lettuce wraps to make this dish suitable for gluten-sensitive eaters.
- Breakfast Tacos: Replace the beef with scrambled eggs and add breakfast sausage for a morning treat!
Serving Suggestions for Oven-Baked Cheesy Tacos (Crispy & Loaded)
- Side Salad: Pair your tacos with a fresh garden salad for a light and crunchy contrast.
- Rice or Quinoa: Serve with seasoned rice or quinoa for a filling meal.
- Refreshing Drinks: Enjoy with a cold margarita or a fruity mocktail to elevate the experience.
- Presentation: Serve on a colorful platter, garnished with lime wedges and extra cilantro for a vibrant touch.
FAQs about Oven-Baked Cheesy Tacos (Crispy & Loaded)
Can I make Oven-Baked Cheesy Tacos (Crispy & Loaded) ahead of time?
Absolutely! You can prepare the filling and assemble the tacos in advance. Just cover them and store in the fridge. When you’re ready to eat, pop them in the oven for a quick bake!
What can I use instead of ground beef?
If you’re looking for alternatives, ground turkey or chicken works wonderfully. For a vegetarian option, try black beans or lentils. They’ll still be delicious and satisfying!
How do I store leftovers?
Store any leftover Oven-Baked Cheesy Tacos (Crispy & Loaded) in an airtight container in the fridge. They’ll last for about 3-4 days. Reheat in the oven for the best texture!
Can I freeze these tacos?
Yes! You can freeze the assembled tacos before baking. Just wrap them tightly in foil or plastic wrap. When you’re ready to enjoy, bake them straight from the freezer, adding a few extra minutes to the cooking time.
What toppings do you recommend for these tacos?
Get creative! I love adding fresh cilantro, diced tomatoes, and shredded lettuce. Sour cream, guacamole, and jalapeños are also fantastic options to enhance the flavor of your Oven-Baked Cheesy Tacos (Crispy & Loaded).
Final Thoughts
Making Oven-Baked Cheesy Tacos (Crispy & Loaded) is more than just cooking; it’s about creating joyful moments around the dinner table. The aroma of seasoned beef and melted cheese fills the air, inviting everyone to gather and share stories. Each bite is a delightful crunch, bursting with flavor and topped with fresh ingredients. Whether it’s a casual weeknight or a festive gathering, these tacos bring smiles and satisfaction. I hope you enjoy this recipe as much as I do, and may it inspire countless delicious memories with your loved ones!
Print
Oven-Baked Cheesy Tacos (Crispy & Loaded) You’ll Love
- Total Time: 35 minutes
- Yield: 10 tacos 1x
- Diet: Gluten Free
Description
A delicious twist on classic tacos — tortillas filled with seasoned beef, layered with cheese, and baked until golden and crispy. Perfect for parties, weeknight dinners, or game day!
Ingredients
- 1 lb ground beef (or ground turkey/chicken)
- 1 tbsp olive oil
- 1 small onion, diced
- 2 cloves garlic, minced
- 1 packet taco seasoning (or homemade mix)
- ½ cup tomato sauce or salsa
- Salt & pepper, to taste
- 10 small taco shells (flour or corn, slightly warmed)
- 2 cups shredded cheddar cheese (or Mexican blend)
- 1 cup lettuce, shredded
- ½ cup diced tomatoes
- ½ cup red onion, diced
- ¼ cup fresh cilantro, chopped
- Optional Toppings: Sour cream, Jalapeños, Guacamole, Hot sauce
Instructions
- Preheat oven to 375°F (190°C). Lightly grease a baking dish or line with foil.
- In a skillet, heat olive oil over medium heat. Add onion and garlic, sauté until fragrant. Add ground beef, breaking it up as it cooks. Stir in taco seasoning, tomato sauce, salt, and pepper. Simmer for 5 minutes.
- Fill each taco shell with meat mixture, sprinkle generously with cheese, and place standing side by side in the baking dish.
- Bake for 10–15 minutes, until cheese is melted and tacos are lightly crispy.
- Remove from oven and top with lettuce, tomatoes, onions, and cilantro. Add sour cream, guacamole, or hot sauce if desired.
Notes
- For a healthier option, use ground turkey or chicken.
- Feel free to customize toppings based on your preference.
- These tacos can be made ahead of time and baked just before serving.
- Prep Time: 15 minutes
- Cook Time: 20 minutes
- Category: Main Course
- Method: Baking
- Cuisine: Mexican
Nutrition
- Serving Size: 1 taco
- Calories: 250
- Sugar: 2g
- Sodium: 500mg
- Fat: 15g
- Saturated Fat: 7g
- Unsaturated Fat: 5g
- Trans Fat: 0g
- Carbohydrates: 20g
- Fiber: 2g
- Protein: 15g
- Cholesterol: 50mg


