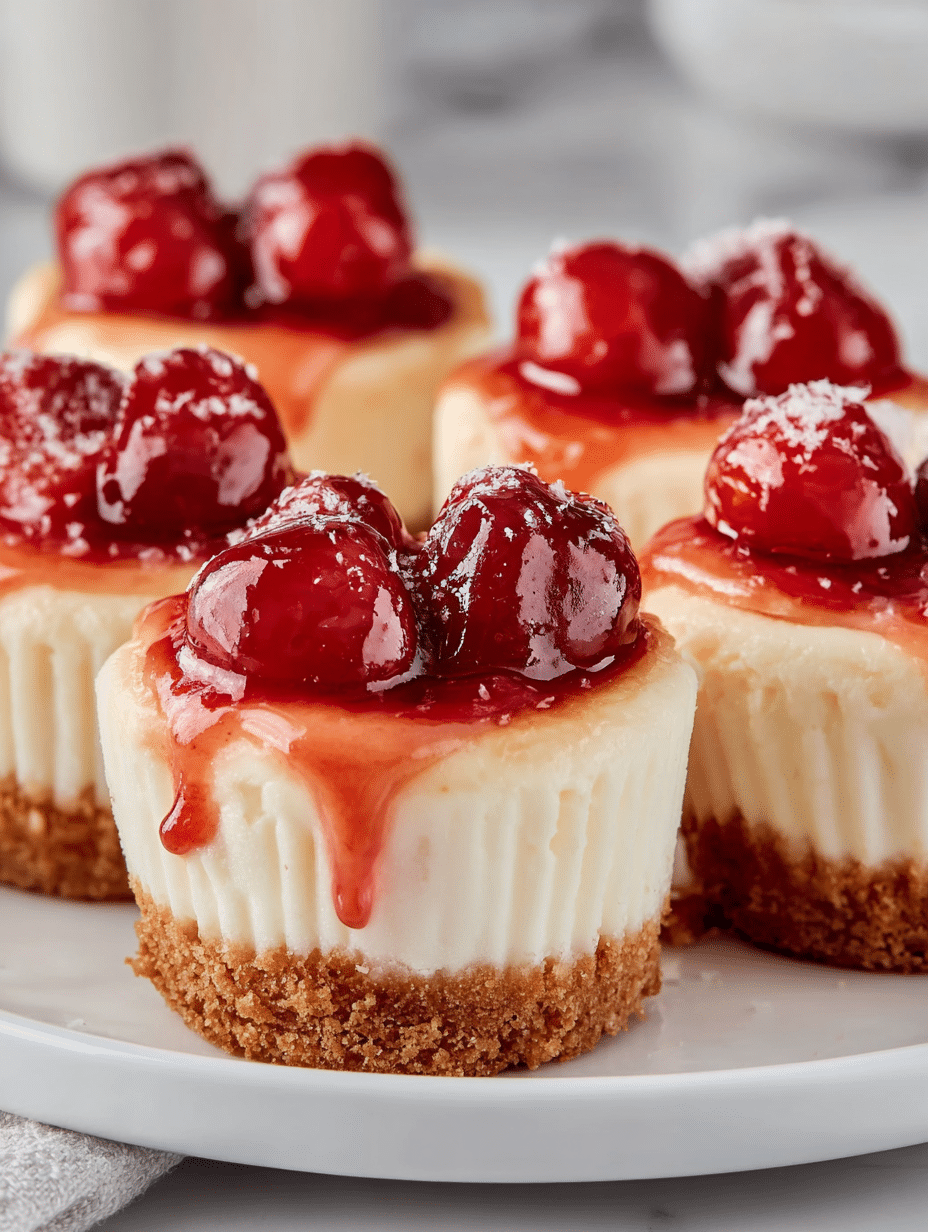
Introduction to Mini Cherry Cheesecake Cups
Hey there, fellow dessert lovers! If you’re anything like me, you know that sometimes life gets busy, and you need a quick solution to satisfy that sweet tooth. Enter the delightful Mini Cherry Cheesecake Cups! These little gems are not only easy to whip up, but they also pack a punch of flavor that will impress your loved ones. Imagine creamy cheesecake nestled in a buttery crust, topped with luscious cherries. It’s a treat that feels fancy but is simple enough for any home cook. Trust me, once you try these, they’ll become your go-to dessert!
Why You’ll Love This Mini Cherry Cheesecake Cups
These Mini Cherry Cheesecake Cups are a dream come true for busy cooks like me! They come together in no time, making them perfect for last-minute gatherings or a sweet treat after dinner. The creamy filling paired with the sweet cherry topping creates a flavor explosion that’s hard to resist. Plus, they’re portioned perfectly, so you can indulge without the guilt. What’s not to love?
Ingredients for Mini Cherry Cheesecake Cups
Let’s gather our ingredients for these delightful Mini Cherry Cheesecake Cups! Each component plays a vital role in creating that perfect balance of flavors and textures. Here’s what you’ll need:
- Graham cracker crumbs: These form the base of our cheesecake cups, providing a sweet and crunchy texture. You can also use digestive biscuits if you prefer.
- Sugar: A little sweetness goes a long way! We’ll use sugar in both the crust and the filling to enhance the flavors.
- Unsalted butter: Melted butter binds the crust together, giving it that rich, buttery flavor. Make sure it’s unsalted to control the overall saltiness.
- Cream cheese: The star of the show! Softened cream cheese creates that creamy, dreamy filling we all love. Let it sit at room temperature for easy mixing.
- Eggs: These help set the filling, giving it a smooth and rich texture. Make sure they’re at room temperature for the best results.
- Vanilla extract: A splash of vanilla adds depth and warmth to the cheesecake filling, making it even more irresistible.
- Sour cream (optional): For those who want an extra creamy texture, sour cream is a fantastic addition. It adds a slight tang that balances the sweetness.
- Cherry pie filling or homemade cherry compote: This is the crowning glory of our Mini Cherry Cheesecake Cups! You can use store-bought cherry pie filling for convenience or make your own for a fresh twist.
For exact measurements, check the bottom of the article where you can find everything listed for easy printing. Now, let’s get ready to create some magic in the kitchen!
How to Make Mini Cherry Cheesecake Cups
Now that we have our ingredients ready, let’s dive into the fun part—making these Mini Cherry Cheesecake Cups! Follow these simple steps, and you’ll be on your way to dessert bliss.
Step 1: Preheat the Oven
First things first, preheat your oven to 325°F (160°C). This ensures that our cheesecake cups bake evenly. While the oven warms up, prepare your muffin tin by lining it with cupcake liners. This makes for easy removal later!
Step 2: Prepare the Crust
In a mixing bowl, combine the graham cracker crumbs, sugar, and melted butter. Mix until everything is well combined. The mixture should resemble wet sand, ready to form a delicious crust.
Step 3: Form the Base
Now, it’s time to create the base! Spoon about 1 tablespoon of the crust mixture into each cupcake liner. Press down firmly with your fingers or the back of a spoon to create a solid base. This step is crucial for holding the cheesecake filling.
Step 4: Make the Cheesecake Filling
In another bowl, beat the softened cream cheese and sugar together until smooth and creamy. This is where the magic begins! Once combined, add the eggs one at a time, mixing gently after each addition. This helps keep the filling light and fluffy.
Step 5: Add Flavor
Next, stir in the vanilla extract and, if you’re feeling adventurous, the sour cream. The sour cream adds an extra layer of creaminess that takes these Mini Cherry Cheesecake Cups to the next level!
Step 6: Fill the Cups
Now, it’s time to fill those cups! Spoon the cheesecake filling evenly over the prepared crusts. Don’t be shy—fill them up to the top, as they won’t rise much during baking.
Step 7: Bake
Place the muffin tin in the preheated oven and bake for 18–20 minutes. You want the centers to be set but still slightly jiggly. This ensures a creamy texture that melts in your mouth!
Step 8: Cool and Chill
Once baked, remove the tin from the oven and let it cool in the pan for about 10 minutes. Then, transfer the cheesecake cups to the fridge and chill for at least 2 hours. This step is essential for achieving that perfect texture.
Step 9: Top with Cherry Filling
After chilling, it’s time for the grand finale! Spoon the cherry pie filling or your homemade cherry compote over each cheesecake cup. The vibrant red cherries add a pop of color and flavor that’s simply irresistible.
Step 10: Serve
Finally, serve your Mini Cherry Cheesecake Cups straight from the fridge for the best texture. Watch as your friends and family dive into these delightful treats!
Tips for Success
- Make sure your cream cheese is softened for easy mixing; it should be at room temperature.
- Don’t overmix the filling after adding the eggs to keep it light and fluffy.
- For a cleaner look, use a cookie scoop to fill the cups evenly.
- Chill the cheesecake cups overnight for the best flavor and texture.
- Experiment with different toppings like blueberries or strawberries for variety!
Equipment Needed
- Muffin tin: A standard 12-cup muffin tin works perfectly. If you don’t have one, a mini muffin tin can be used for bite-sized treats.
- Cupcake liners: These make for easy cleanup. If you’re out, you can grease the muffin tin directly.
- Mixing bowls: A couple of medium-sized bowls will do the trick for mixing the crust and filling.
- Electric mixer: A hand mixer is great for beating the cream cheese, but a whisk works too if you’re feeling strong!
Variations
- Fruit Toppings: Swap out the cherry pie filling for other fruits like blueberries, strawberries, or even a mix of tropical fruits for a refreshing twist.
- Chocolate Lovers: Add a layer of chocolate ganache on top of the cheesecake filling before adding the fruit topping for a decadent chocolate cherry cheesecake.
- Gluten-Free Option: Use gluten-free graham crackers or almond flour for the crust to make these Mini Cherry Cheesecake Cups suitable for gluten-sensitive friends.
- Vegan Version: Substitute cream cheese with a vegan cream cheese alternative and use flax eggs or applesauce instead of regular eggs for a plant-based treat.
- Flavor Infusions: Experiment with different extracts like almond or lemon to give your cheesecake filling a unique flavor profile.
Serving Suggestions
- Pair your Mini Cherry Cheesecake Cups with a dollop of whipped cream for an extra touch of indulgence.
- Serve alongside a scoop of vanilla ice cream for a delightful contrast in temperature and texture.
- For a beautiful presentation, garnish with fresh mint leaves or a sprinkle of powdered sugar.
- Enjoy with a cup of coffee or tea to balance the sweetness.
FAQs about Mini Cherry Cheesecake Cups
As I’ve shared my love for these Mini Cherry Cheesecake Cups, I often get questions from fellow dessert enthusiasts. Here are some of the most common queries I’ve encountered, along with my answers to help you on your cheesecake journey!
Can I make Mini Cherry Cheesecake Cups ahead of time?
Absolutely! These cheesecake cups can be made a day in advance. Just store them in the refrigerator until you’re ready to serve. This actually enhances the flavors!
What can I use instead of cherry pie filling?
If cherries aren’t your thing, feel free to swap in other fruits! Blueberries, strawberries, or even a mix of your favorites work beautifully as toppings for these Mini Cherry Cheesecake Cups.
How do I store leftover Mini Cherry Cheesecake Cups?
Store any leftovers in an airtight container in the fridge. They’ll stay fresh for about 3-4 days, but trust me, they won’t last that long!
Can I freeze Mini Cherry Cheesecake Cups?
Yes, you can freeze them! Just make sure to wrap them tightly in plastic wrap and then place them in a freezer-safe container. Thaw in the fridge before serving for the best texture.
What’s the best way to serve Mini Cherry Cheesecake Cups?
For the best texture, serve them straight from the fridge. A dollop of whipped cream or a sprinkle of chocolate shavings can elevate the presentation and taste!
Final Thoughts
Making Mini Cherry Cheesecake Cups is more than just a cooking task; it’s a delightful experience that brings joy to both the cook and the lucky eaters. The creamy filling, buttery crust, and sweet cherry topping create a symphony of flavors that dance on your taste buds. Plus, these little cups are perfect for sharing at gatherings or enjoying on a quiet evening at home. I love how they can be made ahead of time, allowing you to savor the moment without stress. So, roll up your sleeves and dive into this sweet adventure—you won’t regret it!
Print
Mini Cherry Cheesecake Cups: A Delightful Recipe You Must Try!
- Total Time: 2 hours 40 minutes
- Yield: 12 cups 1x
- Diet: Vegetarian
Description
Mini Cherry Cheesecake Cups are a delightful and easy-to-make dessert that combines a creamy cheesecake filling with a sweet cherry topping, all served in a convenient cup.
Ingredients
- 1 cup (100 g) graham cracker crumbs (or digestive biscuits)
- 3 tbsp sugar
- 4 tbsp (60 g) unsalted butter, melted
- 16 oz (450 g) cream cheese, softened
- ½ cup (100 g) sugar
- 2 large eggs, room temperature
- 1 tsp vanilla extract
- 2 tbsp sour cream (optional, for extra creaminess)
- 1 can (about 20 oz / 560 g) cherry pie filling or homemade cherry compote
Instructions
- Preheat oven to 325°F (160°C). Line a 12-cup muffin tin with cupcake liners.
- Mix graham cracker crumbs, sugar, and melted butter.
- Spoon about 1 tbsp mixture into each liner, pressing down firmly.
- Beat cream cheese and sugar until smooth and creamy.
- Add eggs one at a time, mixing gently.
- Stir in vanilla and sour cream (if using).
- Spoon filling evenly over prepared crusts.
- Bake 18–20 minutes, until centers are set but slightly jiggly.
- Cool in the pan, then refrigerate at least 2 hours.
- Once chilled, spoon cherry pie filling (or compote) over each cheesecake cup.
- Serve straight from the fridge for best texture.
Notes
- For a gluten-free version, use gluten-free graham crackers.
- These cheesecake cups can be made a day in advance and stored in the refrigerator.
- Feel free to substitute the cherry topping with other fruits like blueberries or strawberries.
- Prep Time: 20 minutes
- Cook Time: 18–20 minutes
- Category: Dessert
- Method: Baking
- Cuisine: American
Nutrition
- Serving Size: 1 cup
- Calories: 220
- Sugar: 15g
- Sodium: 150mg
- Fat: 12g
- Saturated Fat: 7g
- Unsaturated Fat: 3g
- Trans Fat: 0g
- Carbohydrates: 25g
- Fiber: 1g
- Protein: 3g
- Cholesterol: 70mg


