Introduction to Cookies & Cream Pudding Cups
Hey there, fellow dessert lovers! If you’re anything like me, you know that sometimes life gets busy, and you need a quick solution to satisfy that sweet tooth. Enter the delightful Cookies & Cream Pudding Cups! These little cups of joy are not only easy to whip up, but they also bring a smile to anyone’s face. Whether you’re hosting a gathering or just treating yourself after a long day, this recipe is perfect for impressing your loved ones or simply indulging in a creamy, dreamy dessert. Let’s dive into this delicious adventure!
Why You’ll Love This Cookies & Cream Pudding Cups
These Cookies & Cream Pudding Cups are a game-changer for any dessert lover! They come together in just 20 minutes, making them a breeze for busy days. The creamy texture paired with crunchy Oreo bits creates a delightful contrast that’s hard to resist. Plus, they’re no-bake, so you can skip the oven and still impress your friends and family with a delicious treat. What’s not to love?
Ingredients for Cookies & Cream Pudding Cups
Let’s gather our ingredients for these delightful Cookies & Cream Pudding Cups. Each component plays a vital role in creating that creamy, dreamy experience we all crave. Here’s what you’ll need:
- Instant vanilla pudding mix: This is the star of the show, providing that rich, creamy base.
- Cold milk: Essential for mixing with the pudding to achieve the perfect consistency. Whole milk gives a richer flavor, but feel free to use your favorite alternative.
- Whipped topping: Whether you choose Cool Whip or homemade whipped cream, this adds a light, fluffy texture that balances the pudding.
- Oreo cookies: The classic chocolate sandwich cookies bring that iconic cookies and cream flavor. You’ll need both crushed and whole cookies for the base and garnish.
- Melted butter: This helps bind the crushed Oreos together, creating a delicious crust at the bottom of each cup.
- Whipped cream (for garnish): A dollop on top makes everything look and taste even better!
- Extra Oreo cookies: Use these for decoration—whole ones for a cute touch and crushed ones for that extra crunch.
For exact measurements, check the bottom of the article where you can find everything listed for easy printing. Now, let’s get ready to create some magic in the kitchen!

How to Make Cookies & Cream Pudding Cups
Now that we have our ingredients ready, let’s dive into the fun part—making these Cookies & Cream Pudding Cups! Follow these simple steps, and you’ll have a delicious dessert in no time.
Step 1: Prepare the Oreo Base
First things first, let’s create that scrumptious Oreo base. In a bowl, mix the crushed Oreos with melted butter until everything is well combined. The butter acts like a glue, holding those crunchy bits together. Once mixed, take about 2–3 tablespoons of this mixture and press it firmly into the bottom of each cup. This will form a delightful crust that sets the stage for the creamy goodness to come!
Step 2: Make the Pudding Mixture
Next up, it’s time to make the pudding! In a separate bowl, whisk together the instant vanilla pudding mix and cold milk. Keep whisking until the mixture thickens up nicely. This step is crucial because it gives our Cookies & Cream Pudding Cups that rich, velvety texture we all love. It should take just a couple of minutes, so don’t rush—enjoy the process!
Step 3: Fold in Whipped Topping
Now, let’s add some fluffiness to our pudding! Gently fold in the whipped topping into the thickened pudding mixture. Use a spatula and be careful not to deflate the whipped cream too much. This step is what makes the pudding light and airy, creating a perfect balance with the dense Oreo crust.
Step 4: Add Crushed Oreos
For that authentic cookies and cream flavor, it’s time to stir in the crushed Oreos. This adds a delightful texture and extra chocolatey goodness to the pudding. Just fold them in gently, ensuring they’re evenly distributed throughout the mixture. Trust me, this is where the magic happens!
Step 5: Assemble the Cups
Now comes the fun part—assembling our Cookies & Cream Pudding Cups! Spoon the pudding mixture over the Oreo crust in each cup. Make sure to smooth the tops for a nice finish. You want each cup to look as good as it tastes, so take your time with this step. It’s all about presentation!
Step 6: Chill and Garnish
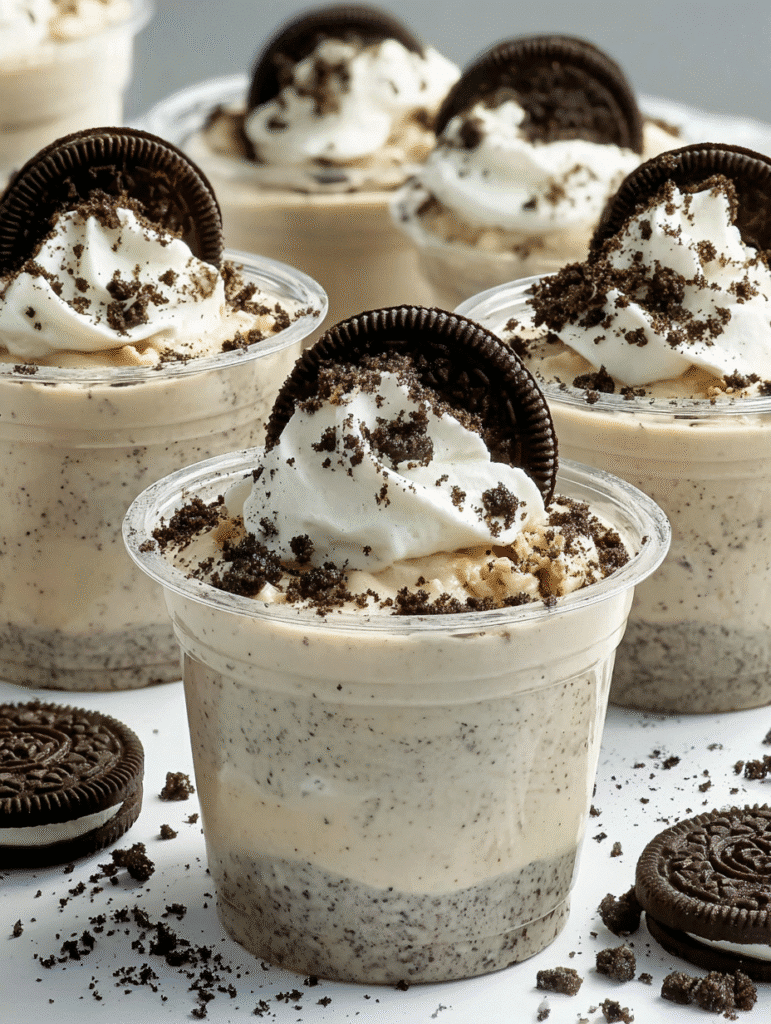
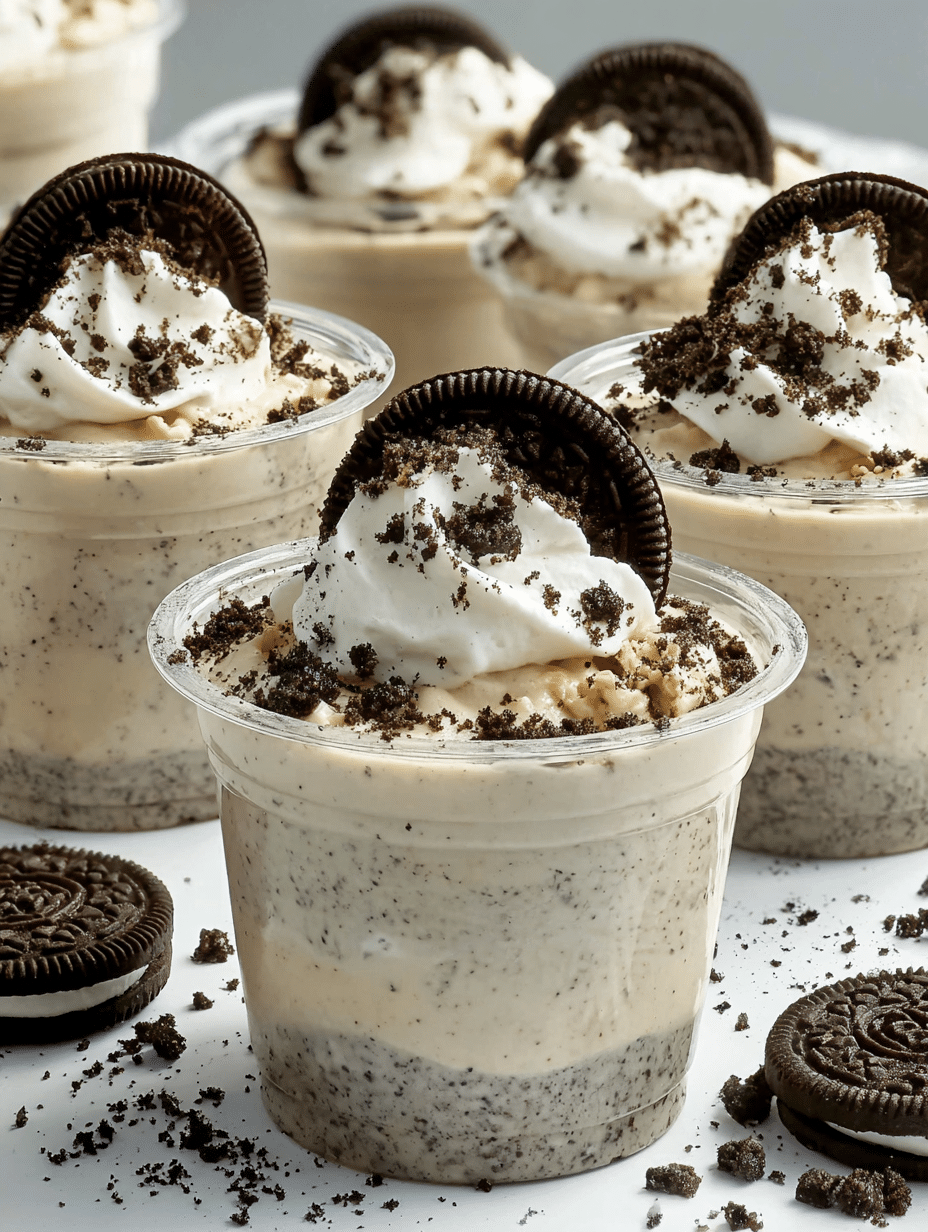
Finally, it’s time to let these beauties chill in the refrigerator for at least an hour. This allows the flavors to meld together beautifully. Once they’re chilled, it’s time to garnish! Top each cup with a dollop of whipped cream, sprinkle some crushed Oreos on top, and add a whole cookie for that extra flair. Your Cookies & Cream Pudding Cups are now ready to impress!
Tips for Success
- Use whole milk for a creamier texture; it makes a world of difference!
- Chill the cups longer than an hour if you can; the flavors deepen beautifully.
- Make these a day ahead for a stress-free dessert option.
- Feel free to experiment with different cookie brands for unique flavors.
- Don’t skip the garnish; it adds a lovely finishing touch!
Equipment Needed
- Mixing bowls: A medium bowl for the pudding and a smaller one for the Oreo base.
- Whisk: Essential for mixing the pudding; a fork can work in a pinch.
- Spatula: Perfect for folding in the whipped topping.
- Cups or dessert glasses: Use any small containers you have on hand.
Variations
- Chocolate Pudding Base: Swap the vanilla pudding mix for chocolate pudding for a double chocolate delight!
- Nut Butter Swirl: Add a spoonful of peanut butter or almond butter to the pudding mixture for a nutty twist.
- Gluten-Free Option: Use gluten-free Oreo cookies to make this dessert suitable for those with gluten sensitivities.
- Fruit Add-Ins: Mix in some chopped strawberries or raspberries for a fruity contrast to the rich pudding.
- Vegan Version: Substitute the pudding mix with a vegan alternative and use coconut whipped cream for a dairy-free treat.
Serving Suggestions
- Pair your Cookies & Cream Pudding Cups with a scoop of vanilla ice cream for an extra indulgent treat.
- Serve alongside fresh fruit like strawberries or raspberries for a refreshing contrast.
- For a fun presentation, use clear cups to showcase the layers.
- Enjoy with a glass of cold milk or a rich coffee for a delightful pairing.
FAQs about Cookies & Cream Pudding Cups
Got questions about these delightful Cookies & Cream Pudding Cups? I’ve got you covered! Here are some common queries that might pop up while you’re whipping up this delicious dessert.
Can I make these pudding cups in advance?
Absolutely! In fact, making them a day ahead enhances the flavors. Just keep them covered in the fridge until you’re ready to serve.
What can I use instead of whipped topping?
If you prefer homemade, you can use freshly whipped cream. Just make sure it’s stabilized so it holds up well in the pudding cups.
Can I use different cookies?
Of course! While Oreos are classic, feel free to experiment with other sandwich cookies for a unique twist on your Cookies & Cream Pudding Cups.
How long do these pudding cups last in the fridge?
They’ll stay fresh for about 3-4 days in the fridge. Just make sure they’re covered to keep them from drying out.
Can I freeze these pudding cups?
While you can freeze them, the texture may change once thawed. It’s best to enjoy them fresh or chilled for the best experience!
Final Thoughts
Creating these Cookies & Cream Pudding Cups is more than just making a dessert; it’s about sharing joy and deliciousness with those you love. Each layer tells a story, from the crunchy Oreo base to the creamy pudding that dances on your taste buds. Whether it’s a cozy night in or a festive gathering, these cups are sure to bring smiles all around. So, roll up your sleeves, gather your ingredients, and let the magic unfold in your kitchen. Trust me, the happiness these little cups bring is worth every moment spent making them!
Print
Cookies & Cream Pudding Cups: Delight Your Taste Buds!
- Total Time: 1 hour 20 minutes
- Yield: 6 servings 1x
- Diet: Vegetarian
Description
Delicious and creamy Cookies & Cream Pudding Cups that are easy to make and perfect for dessert lovers.
Ingredients
- 1 package (3.4 oz) instant vanilla pudding mix
- 2 cups cold milk
- 1 cup whipped topping (Cool Whip or whipped cream)
- 10 Oreo cookies, crushed
- 15 Oreo cookies, crushed into fine crumbs
- 3 tbsp melted butter
- Whipped cream (for garnish)
- Extra Oreo cookies (whole + crushed, for garnish)
Instructions
- Mix crushed Oreos with melted butter until evenly combined.
- Press 2–3 tbsp of mixture into the bottom of each cup to form the base.
- In a bowl, whisk pudding mix and cold milk until thickened.
- Fold in whipped topping until smooth and fluffy.
- Stir in crushed Oreos for that cookies & cream texture.
- Spoon pudding mixture over the Oreo crust layer in each cup.
- Smooth the tops.
- Refrigerate for at least 1 hour to let the flavors set.
- Top each cup with whipped cream, sprinkle with more crushed Oreos, and place a whole cookie on top for decoration.
Notes
- For a richer flavor, use whole milk instead of low-fat milk.
- Letting the cups chill longer enhances the flavor.
- These can be made a day in advance for convenience.
- Prep Time: 20 minutes
- Cook Time: 0 minutes
- Category: Dessert
- Method: No-Bake
- Cuisine: American
Nutrition
- Serving Size: 1 cup
- Calories: 250
- Sugar: 18g
- Sodium: 150mg
- Fat: 12g
- Saturated Fat: 7g
- Unsaturated Fat: 3g
- Trans Fat: 0g
- Carbohydrates: 32g
- Fiber: 1g
- Protein: 3g
- Cholesterol: 20mg


