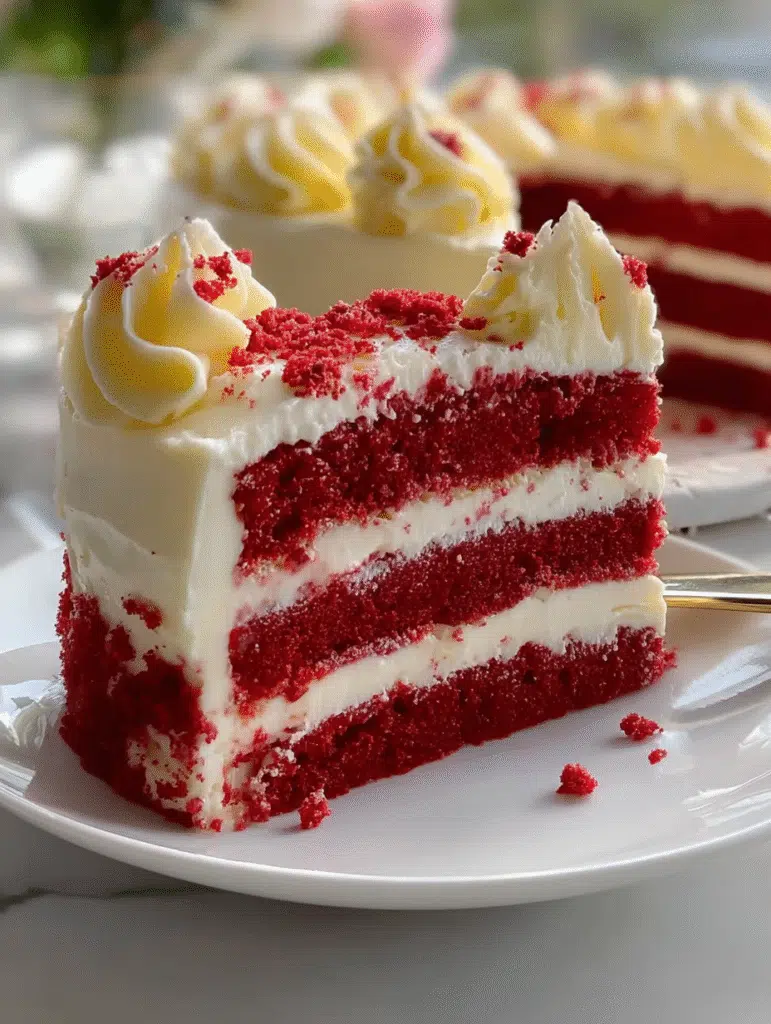
Introduction to Classic Red Velvet Layer Cake with Cream Cheese Frosting
Welcome to the world of baking bliss! If you’re looking for a show-stopping dessert, the Classic Red Velvet Layer Cake with Cream Cheese Frosting is your answer. This cake isn’t just a feast for the eyes; it’s a delightful treat that brings joy to any celebration. Whether it’s a birthday, anniversary, or just a cozy family gathering, this cake is sure to impress your loved ones. Plus, it’s surprisingly easy to whip up, making it a perfect solution for those busy days when you want to create something special without the fuss.
Why You’ll Love This Classic Red Velvet Layer Cake with Cream Cheese Frosting
This Classic Red Velvet Layer Cake with Cream Cheese Frosting is a true crowd-pleaser. It’s not just about the stunning red hue; it’s about the rich, velvety texture that melts in your mouth. Plus, the cream cheese frosting adds a tangy sweetness that perfectly balances the cake. Best of all, it’s simple to make, so you can spend less time in the kitchen and more time enjoying the smiles on your loved ones’ faces.
Ingredients for Classic Red Velvet Layer Cake with Cream Cheese Frosting
Gathering the right ingredients is the first step to creating your masterpiece. Here’s what you’ll need for this Classic Red Velvet Layer Cake with Cream Cheese Frosting:
- All-purpose flour: The backbone of your cake, providing structure and texture.
- Granulated sugar: Sweetens the cake and helps create that lovely moist crumb.
- Baking soda: This leavening agent gives the cake its lift, making it light and fluffy.
- Salt: Enhances the flavors, balancing the sweetness beautifully.
- Cocoa powder: Just a hint adds depth to the flavor without overpowering the red velvet essence.
- Vegetable oil: Keeps the cake moist and tender, ensuring every bite is delightful.
- Buttermilk: Adds a tangy flavor and helps create that signature velvety texture.
- Large eggs: Bind the ingredients together and contribute to the cake’s richness.
- Red food coloring: The star of the show! It gives the cake its iconic red hue.
- White vinegar: Reacts with the baking soda for a lighter cake and enhances the red color.
- Vanilla extract: Adds a warm, sweet aroma that complements the other flavors.
- Cream cheese: The key ingredient for the frosting, providing that creamy, tangy goodness.
- Unsalted butter: Adds richness to the frosting, making it smooth and spreadable.
- Powdered sugar: Sweetens the frosting and gives it that fluffy texture.
For those who might want to experiment, you can adjust the amount of food coloring for a deeper red or swap buttermilk with regular milk mixed with a splash of vinegar. All ingredient quantities are listed at the bottom of the article for easy reference and printing!
How to Make Classic Red Velvet Layer Cake with Cream Cheese Frosting
Step 1: Preheat and Prepare
First things first, preheat your oven to 350°F (175°C). While it warms up, grab three 8-inch round cake pans. Grease and flour them well, then line the bottoms with parchment paper. This little trick ensures your cakes slide out easily after baking. Trust me, there’s nothing worse than a cake that sticks!
Step 2: Mix Dry Ingredients
In a medium bowl, whisk together the all-purpose flour, granulated sugar, baking soda, salt, and cocoa powder. This step is crucial! It helps to evenly distribute the leavening agents and cocoa, ensuring a consistent texture throughout your Classic Red Velvet Layer Cake with Cream Cheese Frosting. Plus, it’s a great way to get your arm workout in!
Step 3: Combine Wet Ingredients
In a large bowl, mix together the vegetable oil, buttermilk, eggs, red food coloring, white vinegar, and vanilla extract until smooth. The vibrant red color will start to shine through, and the mixture will smell heavenly! This blend is what gives your cake that rich, velvety texture that everyone loves.
Step 4: Combine Mixtures
Now, gradually add the dry mixture to the wet mixture. Stir gently until just combined. Be careful not to overmix; we want a tender cake, not a tough one! The batter should be smooth and luscious, ready to transform into a beautiful cake.
Step 5: Bake the Cake
Divide the batter evenly among the prepared pans. Pop them into the oven and bake for 25–30 minutes. You’ll know they’re done when a toothpick inserted in the center comes out clean. The aroma wafting through your kitchen will be pure bliss, making it hard to wait!
Step 6: Cool the Cakes
Once baked, let the cakes cool in the pans for about 10 minutes. Then, carefully remove them and transfer to wire racks to cool completely. This step is essential! If you frost them while warm, the frosting will melt away, and we definitely don’t want that!
Step 7: Make the Frosting
In a mixing bowl, beat the softened cream cheese and unsalted butter together until smooth and creamy. Then, gradually add the sifted powdered sugar and vanilla extract. Keep mixing until the frosting is fluffy and spreadable. This creamy goodness is what makes the cake truly irresistible!
Step 8: Assemble the Cake
Now comes the fun part! Place one cooled cake layer on a serving plate. Spread an even layer of frosting on top. Repeat this with the second and third layers. Once stacked, frost the entire outside of the cake. Get creative with decorative swirls and sprinkle some red velvet crumbs on top for that extra touch. Your Classic Red Velvet Layer Cake with Cream Cheese Frosting is now ready to shine!
Tips for Success
- Always use room temperature ingredients for a smoother batter.
- Don’t skip the parchment paper; it makes cake removal a breeze.
- For a richer flavor, let the frosted cake sit for a few hours before serving.
- Use a serrated knife to level the cake layers for a professional look.
- Store leftovers in the fridge to keep the frosting fresh and creamy.
Equipment Needed
- Three 8-inch round cake pans (or two pans and a muffin tin for cupcakes)
- Mixing bowls (a large and a medium will do)
- Whisk (a fork works in a pinch)
- Electric mixer (a hand whisk can be used, but it’ll take longer)
- Cooling racks (or a plate to cool the cakes on)
Variations
- Chocolate Red Velvet: Add an extra tablespoon of cocoa powder for a richer chocolate flavor.
- Gluten-Free Option: Substitute all-purpose flour with a gluten-free blend for a delicious gluten-free version.
- Vegan Twist: Replace eggs with flaxseed meal and use plant-based butter and cream cheese for a vegan-friendly cake.
- Spiced Red Velvet: Add a pinch of cinnamon or nutmeg to the batter for a warm, spiced flavor.
- Fruit-Filled Layers: Incorporate layers of fresh raspberries or strawberries between the cake layers for a fruity surprise.

Serving Suggestions
- Pair with a scoop of vanilla ice cream for a delightful contrast.
- Serve alongside fresh berries to add a pop of color and freshness.
- Drizzle with chocolate sauce for an indulgent touch.
- Present on a decorative cake stand for an elegant display.
- Enjoy with a cup of coffee or tea for a cozy treat.
FAQs about Classic Red Velvet Layer Cake with Cream Cheese Frosting
Can I make the Classic Red Velvet Layer Cake with Cream Cheese Frosting ahead of time?
Absolutely! You can bake the cake layers a day in advance. Just wrap them tightly in plastic wrap and store them in the fridge. Frosting can also be made ahead and stored in the refrigerator. Just give it a quick mix before using!
What can I substitute for buttermilk in this recipe?
If you don’t have buttermilk on hand, you can easily make a substitute. Just mix one cup of regular milk with a tablespoon of vinegar or lemon juice. Let it sit for about 5 minutes, and you’re good to go!
How do I store leftovers of the Classic Red Velvet Layer Cake with Cream Cheese Frosting?
Store any leftover cake in an airtight container in the refrigerator. It will stay fresh for up to three days. Just remember to let it come to room temperature before serving for the best flavor!
Can I freeze the Classic Red Velvet Layer Cake with Cream Cheese Frosting?
Yes, you can freeze the cake! Wrap the layers tightly in plastic wrap and then in aluminum foil. For the frosting, store it in an airtight container. When you’re ready to enjoy, just thaw in the fridge overnight and frost before serving.
What’s the best way to decorate the Classic Red Velvet Layer Cake?
Get creative! You can use swirls of frosting, fresh berries, or even chocolate shavings. For a classic touch, sprinkle some red velvet crumbs on top. The key is to have fun and let your personality shine through!
Final Thoughts
Creating a Classic Red Velvet Layer Cake with Cream Cheese Frosting is more than just baking; it’s about crafting memories. Each slice is a celebration, a moment to share laughter and joy with family and friends. The vibrant red layers and creamy frosting bring smiles that are simply priceless. Whether it’s a special occasion or a simple gathering, this cake transforms any moment into something extraordinary. So, roll up your sleeves, embrace the process, and let the delightful aroma fill your kitchen. Trust me, the happiness this cake brings is worth every bit of effort!
Print
Classic Red Velvet Layer Cake with Cream Cheese Frosting delight awaits!
- Total Time: 1 hour
- Yield: 10–12 servings 1x
- Diet: Vegetarian
Description
A delicious and visually stunning Classic Red Velvet Layer Cake with Cream Cheese Frosting, perfect for any celebration.
Ingredients
- 2 ½ cups all-purpose flour
- 1 ½ cups granulated sugar
- 1 tsp baking soda
- 1 tsp salt
- 1 tsp cocoa powder
- 1 ½ cups vegetable oil
- 1 cup buttermilk, room temperature
- 2 large eggs, room temperature
- 2 tbsp red food coloring (liquid or gel)
- 1 tsp white vinegar
- 2 tsp vanilla extract
- 16 oz (450 g) cream cheese, softened
- ½ cup (115 g) unsalted butter, softened
- 4 cups powdered sugar, sifted
- 2 tsp vanilla extract
Instructions
- Preheat oven to 350°F (175°C). Grease and flour three 8-inch (20 cm) round cake pans and line bottoms with parchment paper.
- In a medium bowl, whisk flour, sugar, baking soda, salt, and cocoa powder.
- In a large bowl, mix together oil, buttermilk, eggs, food coloring, vinegar, and vanilla until smooth.
- Gradually add the dry mixture into the wet mixture, mixing until just combined.
- Divide batter evenly among prepared pans.
- Bake for 25–30 minutes, or until a toothpick inserted in the center comes out clean.
- Let cakes cool in pans for 10 minutes, then remove and cool completely on wire racks.
- Beat cream cheese and butter together until smooth and creamy.
- Add vanilla extract.
- Gradually beat in powdered sugar until fluffy and spreadable.
- Place one cooled cake layer on a serving plate. Spread an even layer of frosting.
- Repeat with second and third cake layers.
- Frost the outside of the cake completely.
- Decorate with swirls of frosting and red velvet crumbs.
Notes
- Ensure all ingredients are at room temperature for best results.
- Store leftovers in the refrigerator for up to 3 days.
- For a more intense red color, adjust the amount of food coloring as desired.
- Prep Time: 30 minutes
- Cook Time: 30 minutes
- Category: Dessert
- Method: Baking
- Cuisine: American
Nutrition
- Serving Size: 1 slice
- Calories: 450
- Sugar: 35g
- Sodium: 300mg
- Fat: 22g
- Saturated Fat: 10g
- Unsaturated Fat: 8g
- Trans Fat: 0g
- Carbohydrates: 60g
- Fiber: 1g
- Protein: 5g
- Cholesterol: 70mg


