Introduction to Cherries in the Snow
Ah, Cherries in the Snow! Just the name brings a smile to my face. This delightful dessert is like a warm hug on a chilly day. It’s perfect for those moments when you want to impress your loved ones without spending hours in the kitchen. With its layers of fluffy cream, sweet cherries, and soft cake, it’s a refreshing treat that feels special yet is surprisingly easy to whip up. Whether you’re hosting a gathering or just treating yourself, this recipe is a quick solution that will leave everyone asking for seconds!
Why You’ll Love This Cherries in the Snow
This Cherries in the Snow dessert is a true crowd-pleaser! It’s incredibly easy to make, requiring no baking at all. In just 20 minutes, you can create a stunning dish that looks like it took hours. The combination of creamy layers and sweet cherries is simply irresistible. Plus, it’s a fantastic way to use fresh cherries when they’re in season, making it a delightful treat for any occasion!
Ingredients for Cherries in the Snow
Gathering the right ingredients is the first step to creating this delightful dessert. Here’s what you’ll need:
- Angel food cake or pound cake: The base of this dessert. Angel food cake keeps it light, while pound cake adds richness.
- Cream cheese: This softens and adds a creamy texture to the filling, making it luscious and smooth.
- Powdered sugar: Sweetens the cream cheese mixture without the graininess of granulated sugar, ensuring a silky finish.
- Whipped topping: Like Cool Whip, this adds airiness and lightness to the cream layer, making it fluffy and delightful.
- Cherry pie filling or fresh cherries: The star of the show! Use canned for convenience or fresh for a more natural taste.
- Optional garnishes: Extra cherries, shaved white chocolate, or a dusting of powdered sugar can elevate the presentation and add a touch of elegance.
For exact measurements, check the bottom of the article where you can find everything listed for easy printing. Happy cooking!
How to Make Cherries in the Snow
Now that you have all your ingredients ready, let’s dive into the fun part—making Cherries in the Snow! This no-bake dessert is as simple as it is delicious. Follow these steps, and you’ll have a stunning treat that will wow your family and friends.
Step 1: Prepare the Cream Mixture
Start by grabbing a mixing bowl. Beat the softened cream cheese and powdered sugar together until the mixture is smooth and creamy. I like to use an electric mixer for this, but a whisk works too if you’re feeling strong! The goal is to eliminate any lumps, creating a velvety base for your dessert.
Step 2: Fold in the Whipped Topping
Next, gently fold in the whipped topping. This step is crucial for achieving that light, airy texture we all love in Cherries in the Snow. Use a spatula and be careful not to deflate the whipped topping. You want to keep it fluffy, like a cloud of sweetness!
Step 3: Layer the Cake Cubes
Now, it’s time to layer! In a glass trifle dish, start with a layer of cake cubes. You can use angel food cake for a lighter feel or pound cake for a richer taste. Spread the cubes evenly across the bottom, creating a cozy base for the cream and cherries.
Step 4: Add the Cream Layer
Once your cake layer is set, it’s time to spread the cream mixture over the cake. Use a spatula to smooth it out evenly. This creamy layer is where the magic happens, blending beautifully with the cake and cherries to create a delightful experience.
Step 5: Incorporate the Cherry Filling
Now comes the star of the show—add the cherry pie filling or fresh cherries! Spoon it over the cream layer, ensuring every bite will have that sweet cherry goodness. If you’re using fresh cherries, make sure they’re pitted and sliced for easy enjoyment.
Step 6: Repeat Layers
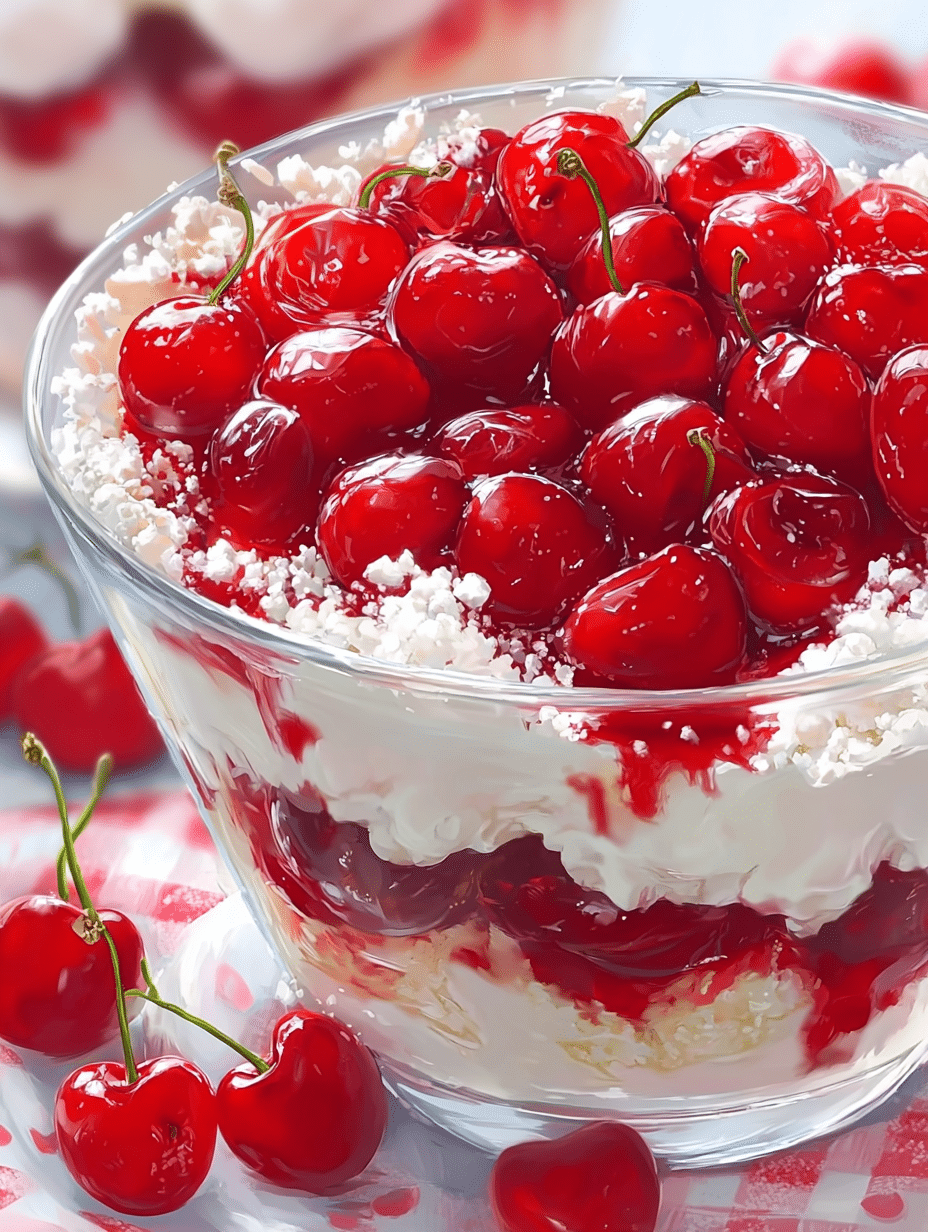
Repeat the layering process until your dish is filled. Start with another layer of cake, followed by cream, and then cherries. Keep going until you reach the top of your dish. Finish with a generous layer of cherries to make it look extra inviting!
Step 7: Chill Before Serving
Finally, cover your dessert and refrigerate it for at least two hours. This chilling time is essential for letting the flavors meld together. Trust me, the wait is worth it! When you finally serve it, the layers will hold beautifully, and the taste will be heavenly.
Tips for Success
- Use room temperature cream cheese for easier mixing and a smoother texture.
- Don’t rush the chilling process; it enhances the flavors and texture.
- For a fun twist, try adding a splash of almond extract to the cream mixture.
- Layering in a clear dish showcases the beautiful colors of the cherries and cream.
- Feel free to customize with your favorite fruits or toppings!
Equipment Needed
- Mixing bowl: A large bowl for combining ingredients. A sturdy glass or ceramic bowl works well.
- Electric mixer: For easy mixing of cream cheese. A whisk can be used if you prefer a workout!
- Spatula: Essential for folding and spreading. A silicone spatula is great for scraping every bit.
- Trifle dish: Perfect for layering. A clear glass bowl or any large serving dish will do.
Variations of Cherries in the Snow
- Chocolate Lovers: Add a layer of chocolate pudding between the cream and cherries for a decadent twist.
- Nutty Delight: Sprinkle chopped nuts, like almonds or pecans, between layers for added crunch and flavor.
- Berry Medley: Swap out cherries for a mix of berries, such as strawberries and blueberries, for a colorful and fruity variation.
- Gluten-Free Option: Use gluten-free cake or even a layer of crushed gluten-free cookies for a different texture.
- Vegan Version: Substitute cream cheese with a vegan alternative and use coconut whipped cream for a dairy-free delight.
Serving Suggestions for Cherries in the Snow
- Pair with a scoop of vanilla ice cream for an extra creamy treat.
- Serve alongside a light, citrusy salad to balance the sweetness.
- For drinks, a sparkling lemonade or iced tea complements the dessert beautifully.
- Garnish with fresh mint leaves for a pop of color and freshness.
- Present in individual cups for a fun, personal touch at gatherings.
FAQs about Cherries in the Snow
As I’ve shared my love for Cherries in the Snow, I often get questions about this delightful dessert. Here are some of the most common queries I’ve encountered, along with my answers to help you create the perfect treat!
Can I use fresh cherries instead of cherry pie filling?
Absolutely! Fresh cherries can add a natural sweetness and vibrant flavor. Just make sure to pit and slice them before layering. They’ll make your Cherries in the Snow even more delightful!
How long can I store Cherries in the Snow?
This dessert can be stored in the refrigerator for up to three days. Just cover it well to keep it fresh. However, I recommend enjoying it within the first couple of days for the best texture and flavor.
Can I make Cherries in the Snow ahead of time?
Yes! This dessert is perfect for making ahead. Prepare it a day in advance and let it chill overnight. The flavors will meld beautifully, making it even more delicious when you serve it!
What can I substitute for whipped topping?
If you prefer a homemade touch, you can whip heavy cream with a bit of sugar and vanilla extract. This will give you a fresh, creamy layer that works wonderfully in Cherries in the Snow.
Is this dessert suitable for special diets?
Yes! You can easily adapt Cherries in the Snow for various dietary needs. Use gluten-free cake for a gluten-free version or swap cream cheese with a vegan alternative for a dairy-free treat. The possibilities are endless!
Final Thoughts
Cherries in the Snow is more than just a dessert; it’s a celebration of flavors and memories. Each layer tells a story, from the soft cake to the creamy filling and the sweet cherries. I love how this recipe brings people together, whether it’s a family gathering or a cozy night in. The joy of serving something so beautiful and delicious is unmatched. Plus, it’s a breeze to make! So, the next time you’re looking for a treat that’s sure to impress, remember this delightful dessert. Trust me, it will become a cherished favorite in your home!
Print
Cherries in the Snow: A Delightful Dessert Recipe!
- Total Time: 2 hours 20 minutes
- Yield: 8–10 servings 1x
- Diet: Vegetarian
Description
Cherries in the Snow is a delightful dessert that combines layers of cake, cream, and cherries for a refreshing treat.
Ingredients
- 1 prepared angel food cake (or pound cake), cut into cubes
- 1 package (8 oz / 225 g) cream cheese, softened
- 1 cup powdered sugar
- 1 container (8 oz / 225 g) whipped topping (like Cool Whip), thawed
- 1 can (21 oz / 595 g) cherry pie filling or 3 cups fresh pitted cherries with syrup
- Optional garnish: extra cherries, shaved white chocolate, or powdered sugar
Instructions
- In a mixing bowl, beat softened cream cheese with powdered sugar until smooth.
- Fold in whipped topping until light and fluffy.
- In a glass trifle dish, start with a layer of cake cubes.
- Spread a layer of cream mixture over the cake.
- Add a layer of cherry pie filling.
- Repeat layers until dish is filled, ending with cherries on top.
- Refrigerate at least 2 hours before serving to let flavors meld.
- Garnish with extra cherries or a dusting of powdered sugar for the “snow” effect.
Notes
- For a richer flavor, use pound cake instead of angel food cake.
- Fresh cherries can be used for a more natural taste.
- Make sure to chill the dessert for the best texture and flavor.
- Prep Time: 20 minutes
- Cook Time: 0 minutes
- Category: Dessert
- Method: No-bake
- Cuisine: American
Nutrition
- Serving Size: 1 serving
- Calories: 250
- Sugar: 20g
- Sodium: 150mg
- Fat: 10g
- Saturated Fat: 5g
- Unsaturated Fat: 3g
- Trans Fat: 0g
- Carbohydrates: 35g
- Fiber: 1g
- Protein: 3g
- Cholesterol: 30mg


